Using Zeek to find persistent threats by monitoring DNS anomalies (part 1)
Posted 29 Sep 2020
Introduction
Ever heard of Bro or Zeek, coolest thing(s) in network traffic analysis? Never got around to install it? I had, many times, and never did, until now. Zeek (formerly Bro) is a free and open-source software network analysis framework. In this article we’re going to take a look at Zeek as an IDS engine and some examples of what you can do with it. We are using the SensorFleet platform to run Zeek Instrument, but you could run Zeek on its own as well.
Many types of customizable rules are supported by Zeek, here’s two:
- Scripts (using the Zeek scripting engine)
- Blacklists (using the Zeek Intel Framework).
We’re going to try both of those to do something useful.
- Part 1: Deploy a script to find persistent threats by monitoring DNS anomalies.
- Part 2: Add a “canary” file to an internal server to be used as a honeypot, and add the file hash to Zeek as a blacklist.
Step 1: Setting up Zeek
Zeek will need a capture interface with mirrored IP traffic.
Setting that up will be heavily environment specific.
For our task, we will want the internal network traffic to be mirrored to our Sensor because we want to see DNS traffic with internal IP addresses.
Setting up a mirror interface is out of scope of this guide, but for general guidelines:
- Have a switch capable or port mirroring
- Configure switch to mirror your internal traffic towards the sensor you’re running Zeek on
- Configure Zeek to listen on that mirror interface
Generic environment
If you are installing Zeek manually, outside of SensorFleet platform, refer to Zeek Installation Manual.
SensorFleet environment
We assume a preconfigured Sensor running the SensorFleet software.
We start by looking up the correct Sensor from the Fleet Management UI.
You can also add Zeek to your Fleet Management if that’s only that you have and the server can handle the load.
We’re going to use “Epycprobe”, our AMD EPYC based test Sensor.
-
Click from the dropdown button and choose Add Instrument.

-
Navigate Zeek Instrument from the list and click Add Intrument.
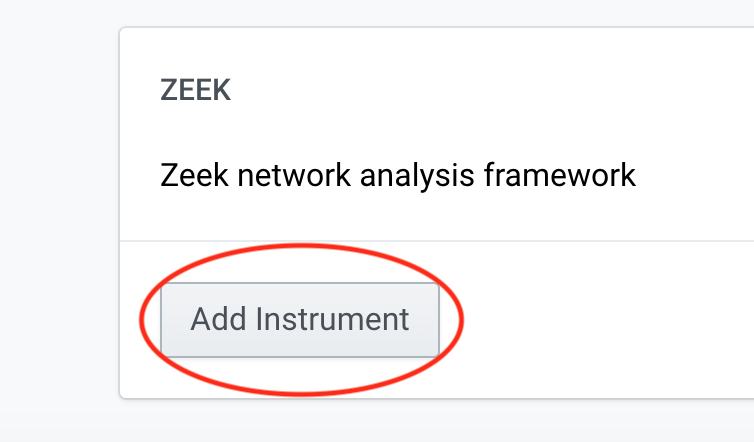
-
Go to FM main UI and choose Configure from the Zeek instrument.

-
We need to add a capture interface before it actually can see any traffic. Choose Add Interface, pick correct Sensor Bridge, choose only RX capability.
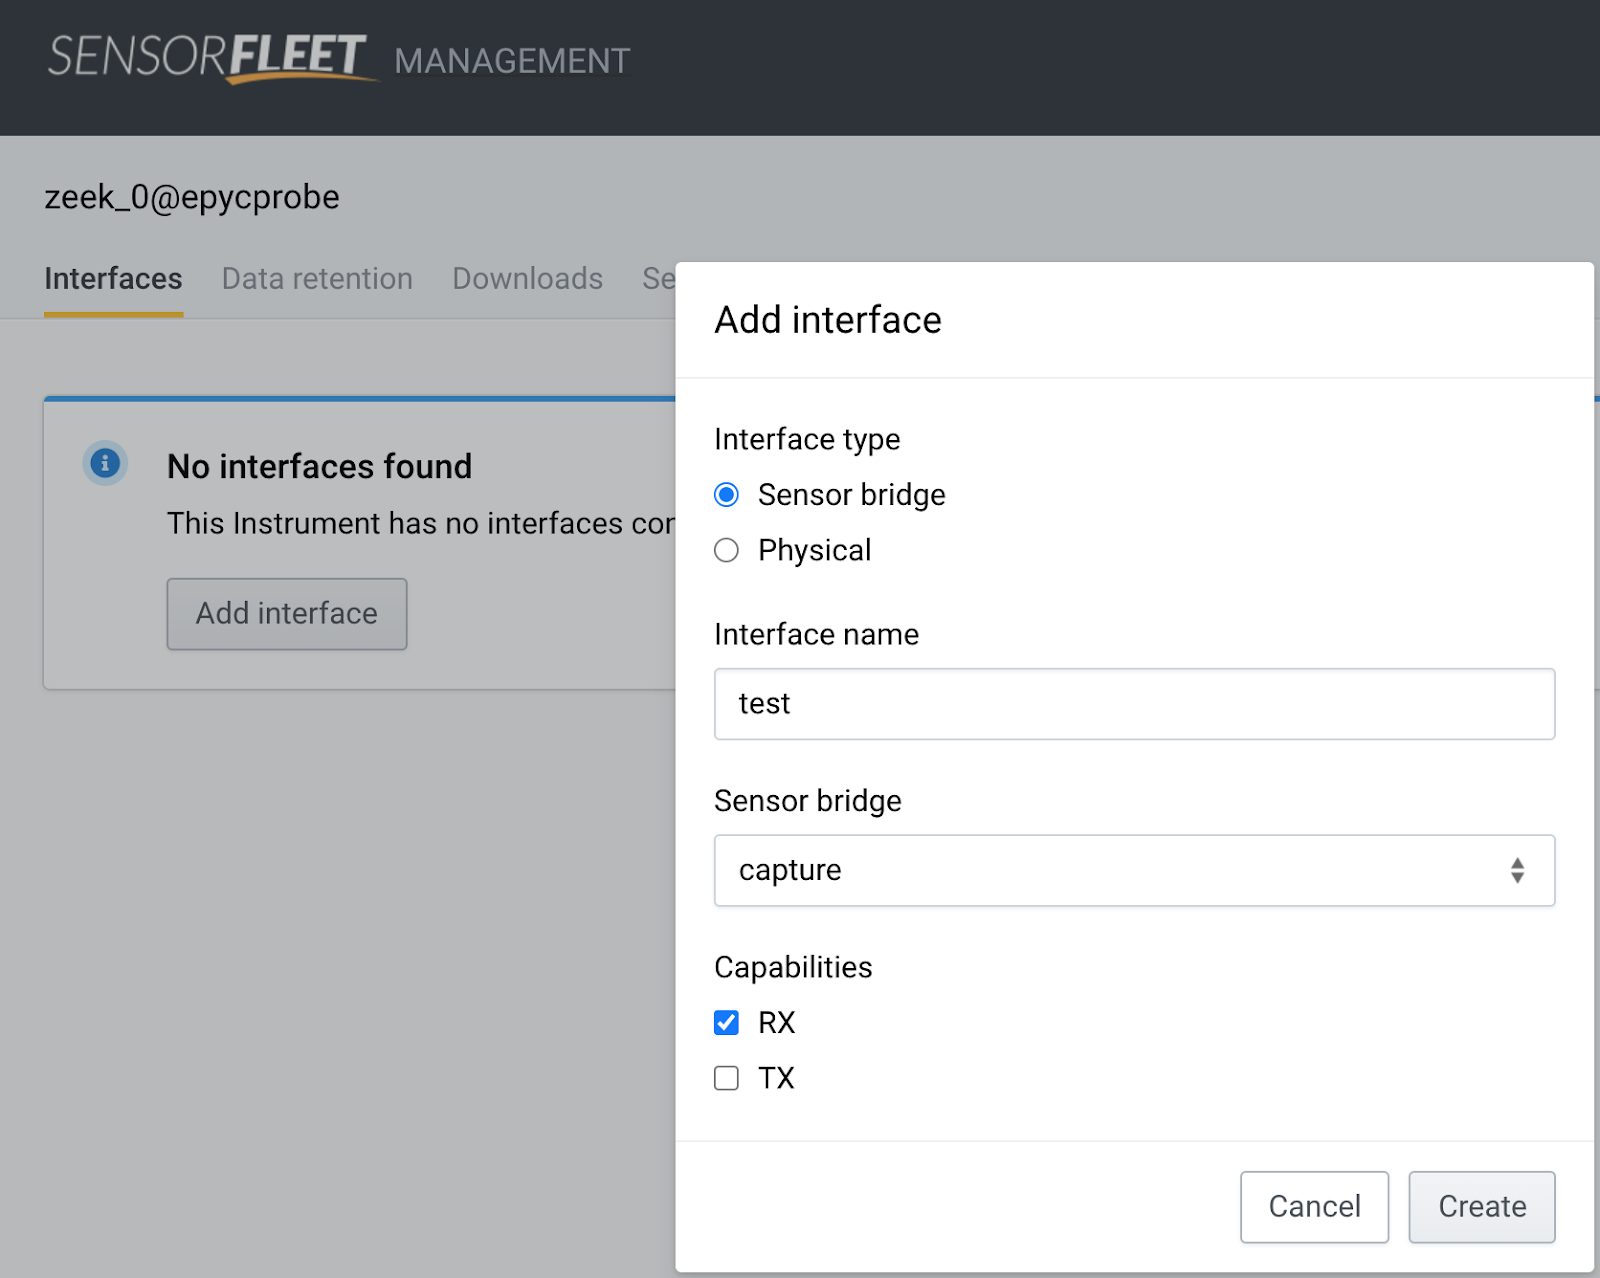
-
Click Create.
Step 2: View Zeek events
Zeek is now running. We can check that by viewing the events Zeek is generating.
Generic environment
If you’re running outside of SensorFleet platform, refer to Logging in Zeek Manual.
Zeek logs individual event types into log files by default, e.g. base.protocols.conn logs to conn.log which could be found in /opt/zeek/logs/current/conn.log depending on the installation.
SensorFleet environment
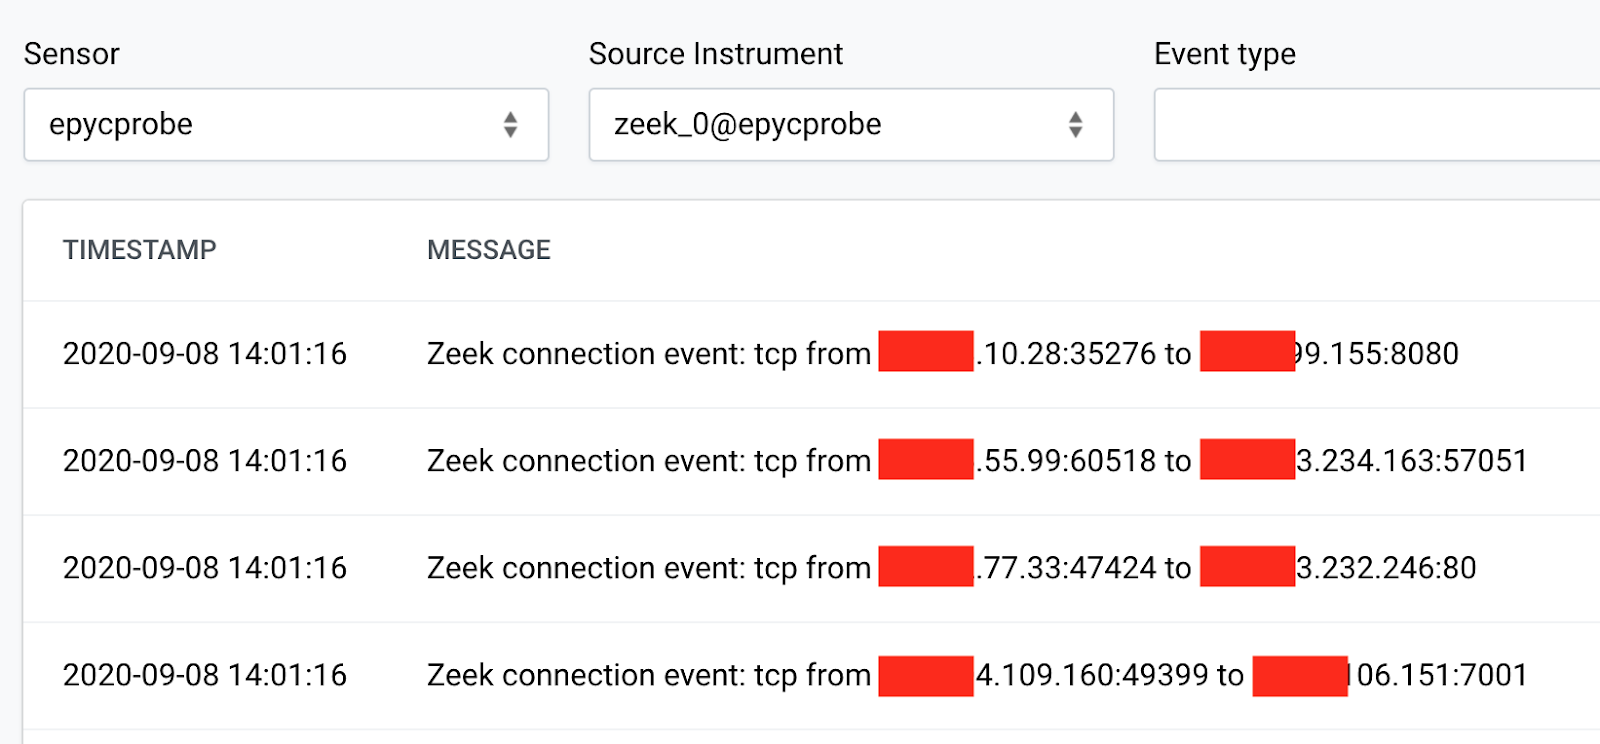
Zeek is quite noisy by default: an event is generated per connection! That is a lot of events and a lot of useless information for many use cases. Unless you’re going to use Zeek as a network history audit tool, you probably want to disable a lot of the default connections. Another approach would be to generate lots of events, and handle them in SIEM accordingly.
Step 3: Configuring Zeek for less noise
Generic environment
- First, locate the file init-default.zeek in your Zeek installation. In our case, that is located at /opt/zeek/share/zeek/base/init-default.zeek.
-
Edit that file with your favorite editor and disable some modules:
vim /opt/zeek/share/zeek/base/init-default.zeek - If you wanted to disable all of them, you’d comment out the @load lines with
the following vim command:
:%s/^@load/#@load/g - Then save and quit using:
:wq - Restart Zeek:
/etc/init.d/zeek restart - Keep disabling zeek modules until you’ve reached the desired noise level in your event log.
SensorFleet environment
- Navigate to Zeek Configuration menu (Zeek Instrument -> Configure -> Custom configuration).
-
Tick off some of the noisiest base modules and hit save.
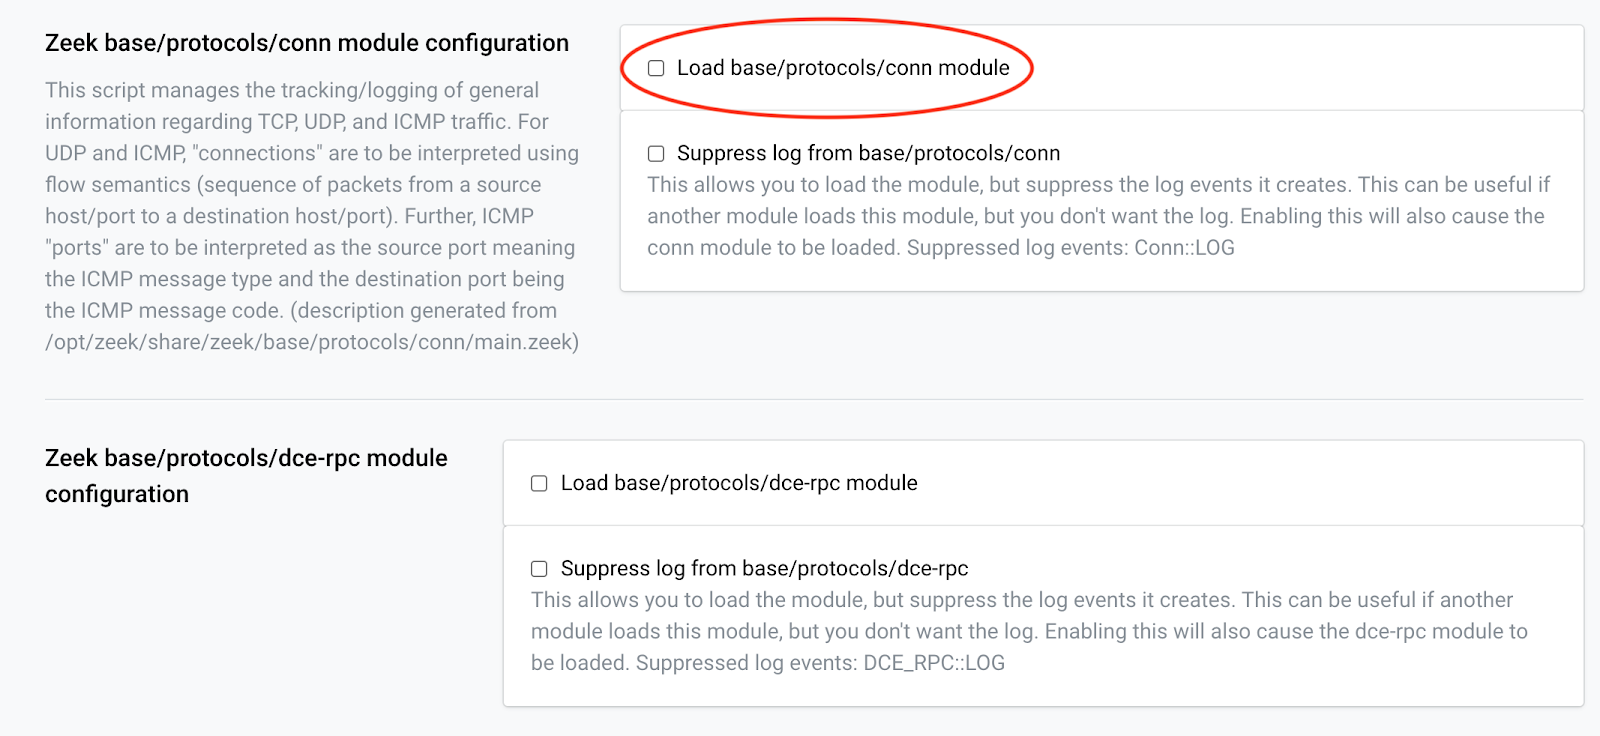
-
Keep disabling Zeek modules until you’ve reached the desired noise level in your event log.
- Prefer the dark, text only screen? No problem, you can use the excellent
fleet CLI tool, in our case:
fleet config edit zeek_0@epycprobeFor more details about the fleet CLI tool, refer to SensorFleet User Manual.
Step 4: Add script to detect DNS anomalies
Generic environment
-
Install the dns-anomalous package using Zeek Package Manager:
zkg install sensorfleet/anomalous-dns -
Restart Zeek instance: (command may depend on installation)
/etc/init.d/zeek restart
SensorFleet environment
- Install IDS Rule Manager Instrument.
For managing the custom Zeek scripts, we’re using the IDS Rule Manager Instrument. If you don’t have it installed yet, just add it using the UI similarly as you added Zeek Instrument.
-
Add DNS anomaly detection script. I created a single-file version of the anomalous-dns Zeek package by github user jbaggs. I also added a more aggressive whitelisting support to it. Let’s add that to our Zeek install.
-
Open IDS Rule Manager Instrument UI

-
Navigate to Zeek tab and click Add script
-
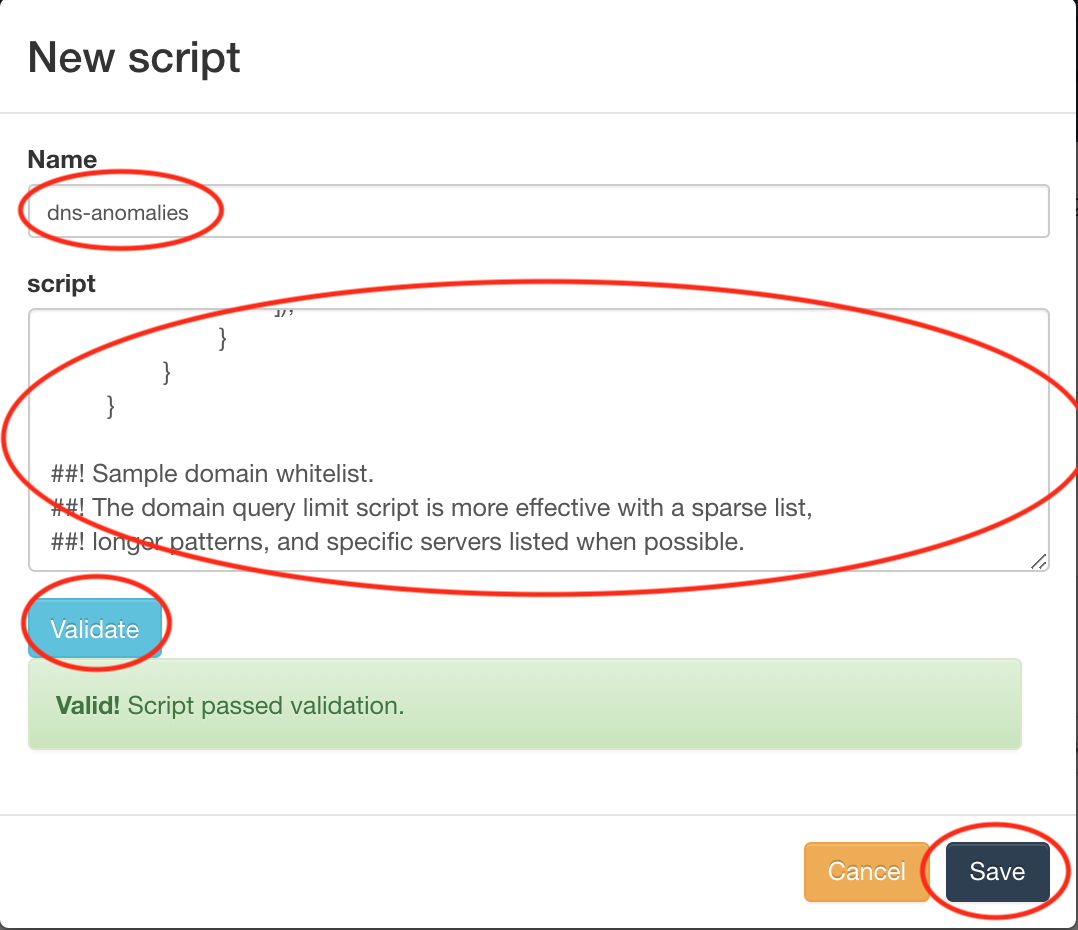
Copy the contents of the anomalous-dns script and paste it into the text field. Type some name for the script, and validate the syntax. Finally, click Save.
-
Click Commit script changes from the IDS Rule Manager UI

-
The Zeek instance will restart with the new script shortly.
Step 5: Configure DNS anomalies whitelist
-
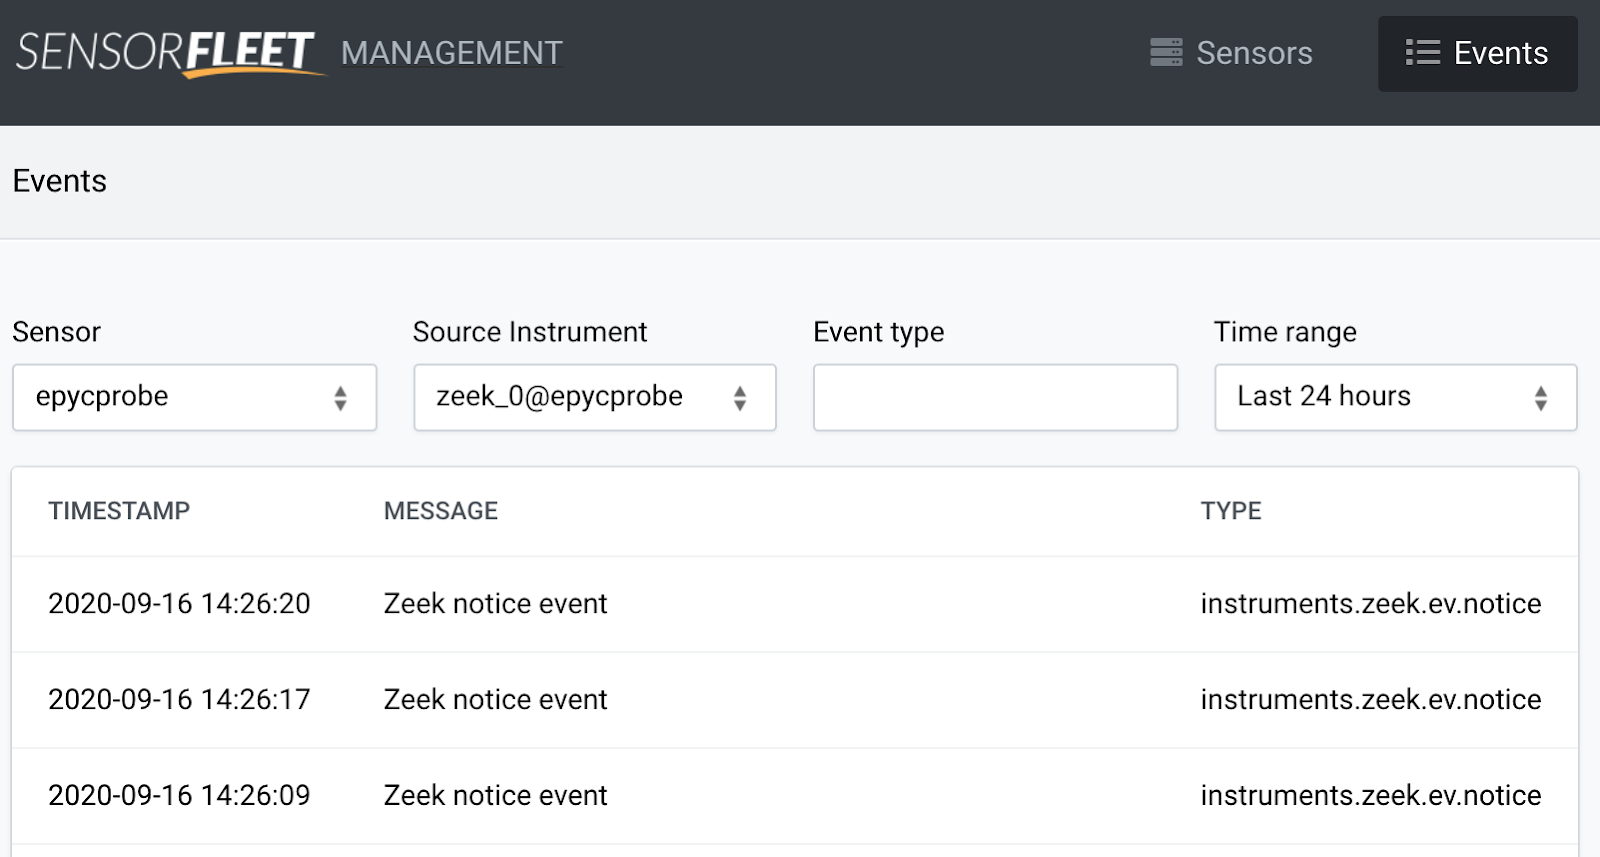
Navigate to Zeek events list to see if it’s producing any events. Depending on the network and port mirroring configuration, you might see false positives in the event output. For SensorFleet environment, use the UI. For generic environment, watch Zeek’s notice.log.
-
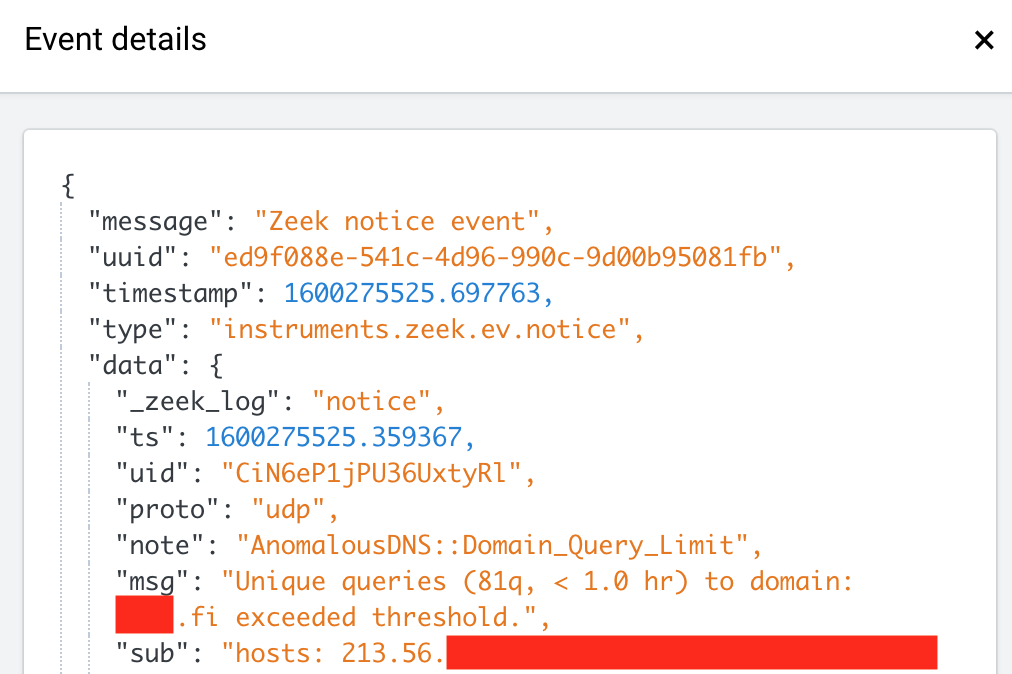
By viewing the produced events, it seems we have some false positives. That’s normal, because there are e.g. some mail servers and domain handling DNS servers in our monitoring setup. We need to configure our whitelist.
- Open the script in a text editor. On SensorFleet environment, you can use the Rule Manager UI for editing. On Generic environment, locate anomalous-dns package in the Zeek installation, and open domain-whitelist.zeek in a text editor.
-
Edit the last few lines, they look like this:
redef domain_whitelist = /.../; redef local_dns_servers = set(...); redef totally_ignored_ips = set(...); - Add any domains or DNS servers to appropriate whitelists. I ended up adding some DNS and mail servers to totally_ignored_ips field to silence them, and a few common domains in domain_whitelist. There are a few syntax samples in the whitelist. For more details, see Zeek scripting manual for set, addr and pattern.
- Save script changes and restart Zeek:
- On SensorFleet, just re-save the script and Commit script changes.
- On General environment, save the script and run
/etc/init.d/zeek restart(depending on the platform).
Step 6: Does it really work?
Once you have the script running, and it’s not creating too much false positives anymore, you may want to see if it really can detect persistent DNS tunnels. Let’s test it.
-
For testing, you will need a Linux or other unix shell, or a Windows PowerShell capable shell in your monitored network that has the host command (or nslookup on windows). The host must not be whitelisted, of course.
-
Command to run in unix shell: (bash-style syntax)
for n in {1..100}; do host dnstest$n.sensorfleet.com 8.8.4.4; done -
Similar test command for Windows powershell:
for (($n = 0); $n -lt 100; $n++) { nslookup "dnstest$i.sensorfleet.com" 8.8.4.4 } -
The test should result in an event like this:
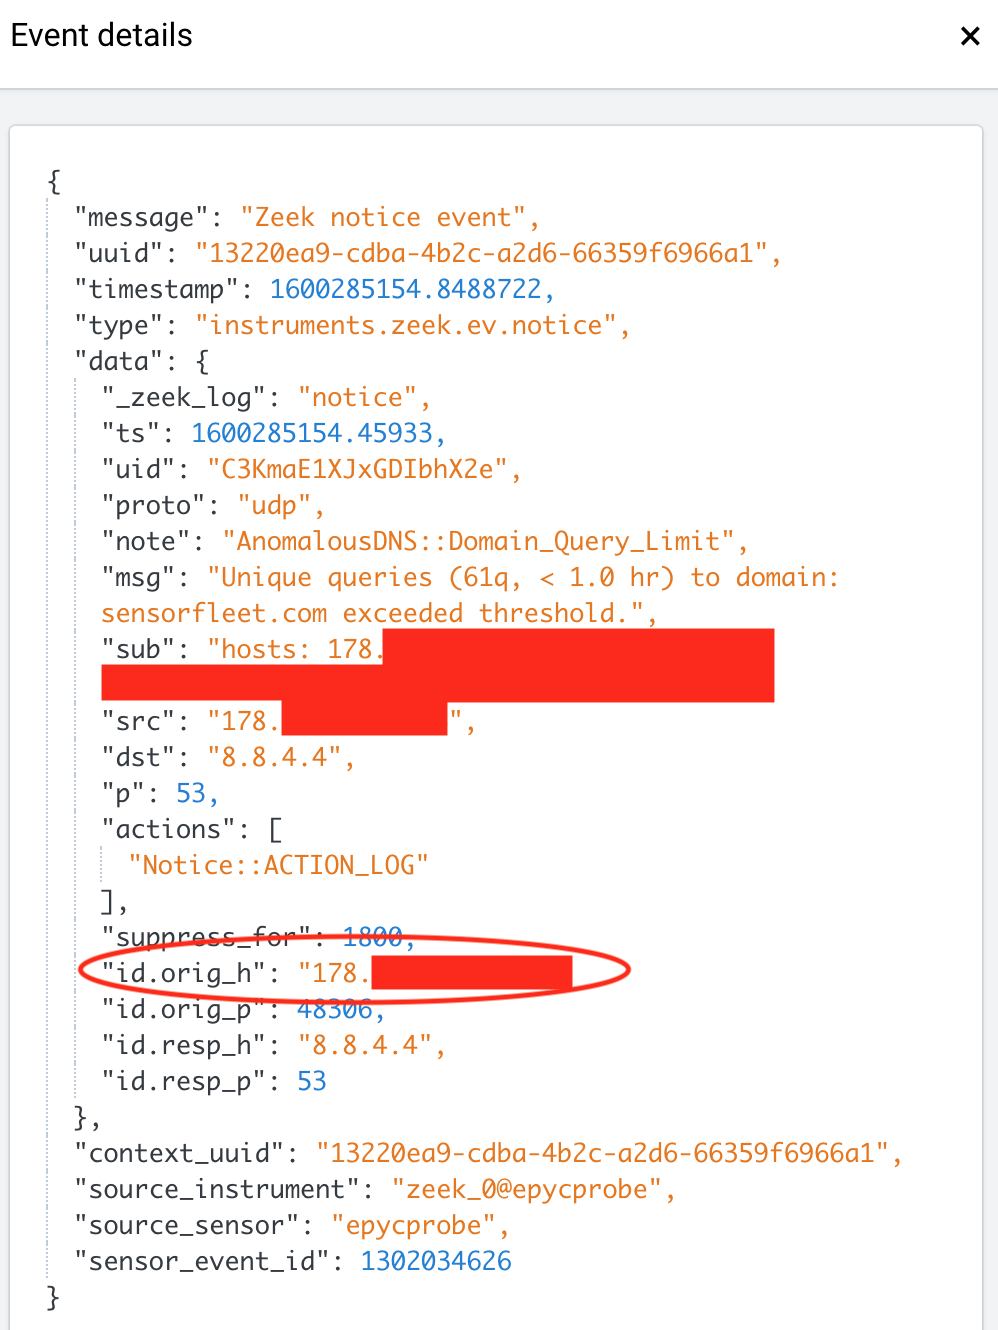
Here, the id.orig_h (or src field) is the source of our potential threat.
Final words
You will now get a notification of anomalous DNS behaviors, such as long running malware C&C connections over DNS. This can be fairly useful if your network is restricted (e.g. HTTP proxy), but allows direct DNS access.
Also, some malwares might use DNS by default, even if HTTP was allowed, because DNS might be harder to detect since they do not make direct connections to the outside world, but instead leverage your DNS resolver.
I found out that configuring the whitelist for nearly zero false positives can take a lot of work, though, depending on your network. That’s why I ended up patching the jbaggs/anomalous-dns for a more aggressive whitelist.
We now use the above detection method in monitoring of our own infrastructure.
Hopefully this will help someone to realize how neat things you can do just by using open source tools such as Zeek. And it gets even easier when using commercial products to round the rough edges a bit.
Stay tuned for the part 2 of our Zeek guide: We’re going to add a “canary” file to an internal server to be used as a honeypot, and add the file hash to Zeek as a blacklist.
